Every indie dev knows the struggle—hunting for 3D assets that look great, are production-ready, and won't destroy your budget or get you into copyright trouble. We've all been there: endlessly scrolling through asset stores, hacking together freebies, or losing weekends inside Blender just trying to get one model right.
That's exactly why we turned to Meshy. With just a few prompts and zero manual modeling, we can go from rough ideas to fully cel-shaded assets ready for Unity. It's fast, fun—and honestly, kind of addictive. In this post, we'll show you how to create 3D game assets without the usual hassle.
Step-by-Step Guide: Stylized 3D Models, No Modeling Needed
Part 1: Generate 3D Game Assets with Meshy
Meshy is an AI-powered 3D model generation tool that helps you quickly create high-quality models. Just upload an image or enter a text prompt, and it will generate the 3D model you have in mind. In this tutorial, we'll be using Meshy's Text to 3D feature.
Step 1: Using Meshy to Generate 3D Model
First, we use Meshy to generate our 3D models. Just click the "Generate" button to get started.
Note: Meshy supports your native language—no need to switch.
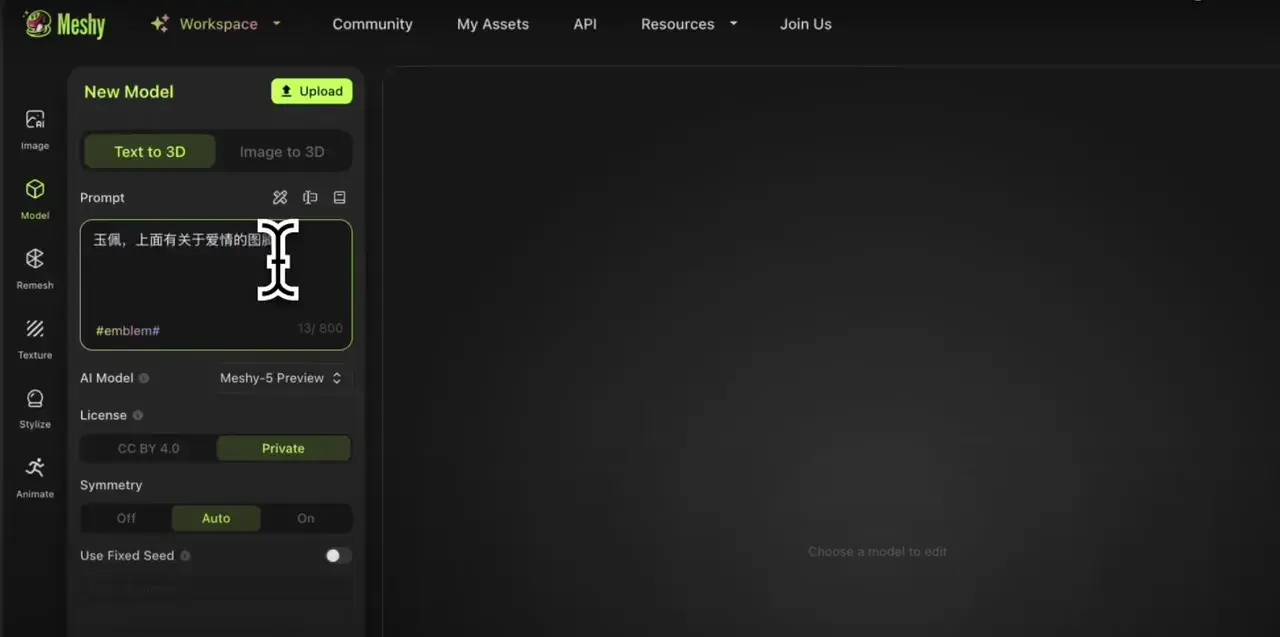
The platform allows us to create high-quality assets with baked lighting as an option. For our stylized workflow, we typically stick with delit texture to retain more control during post-processing.
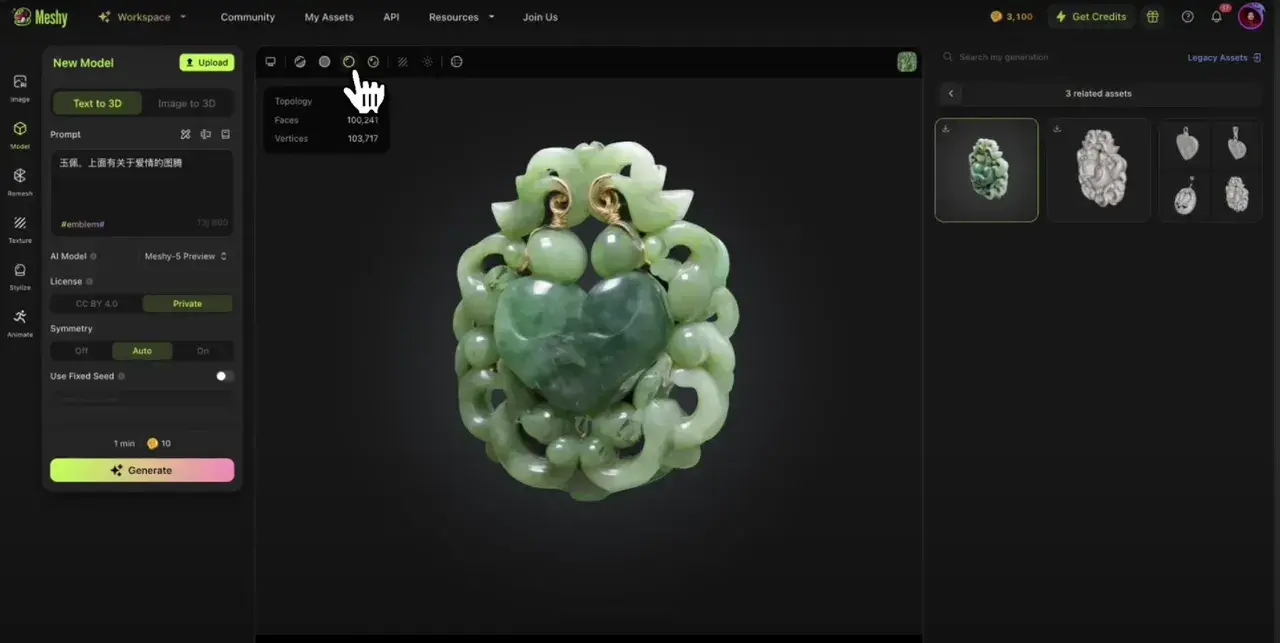
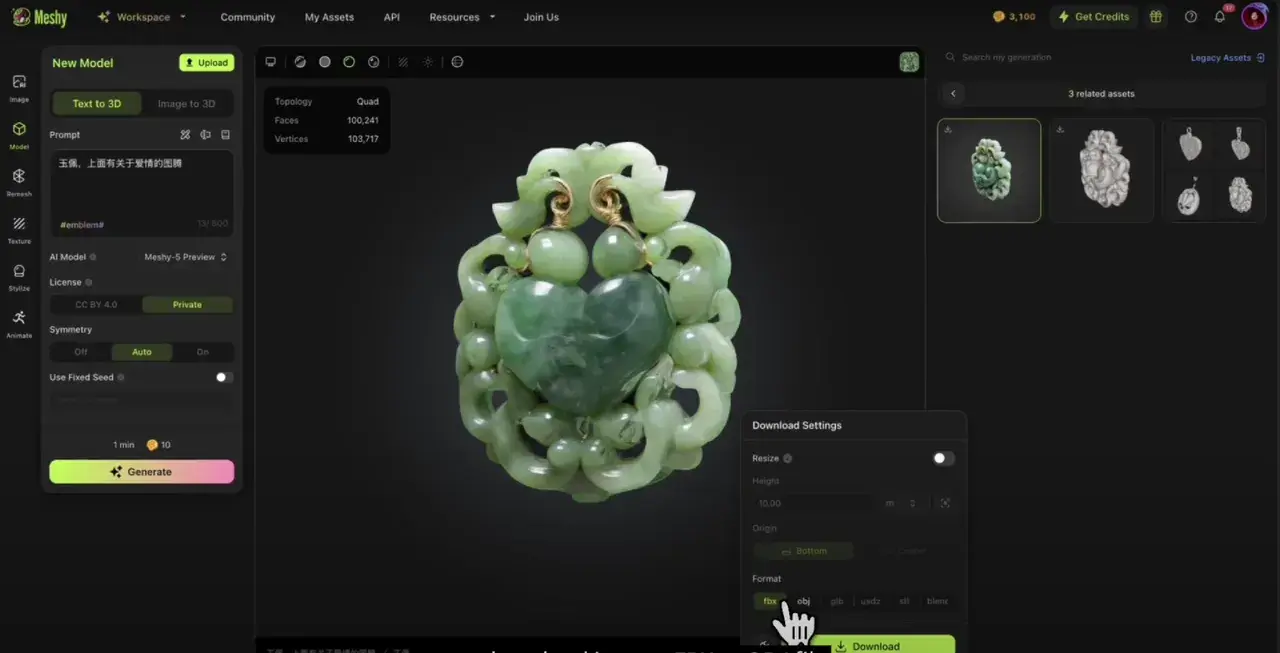
Step 2: Downloading your Model
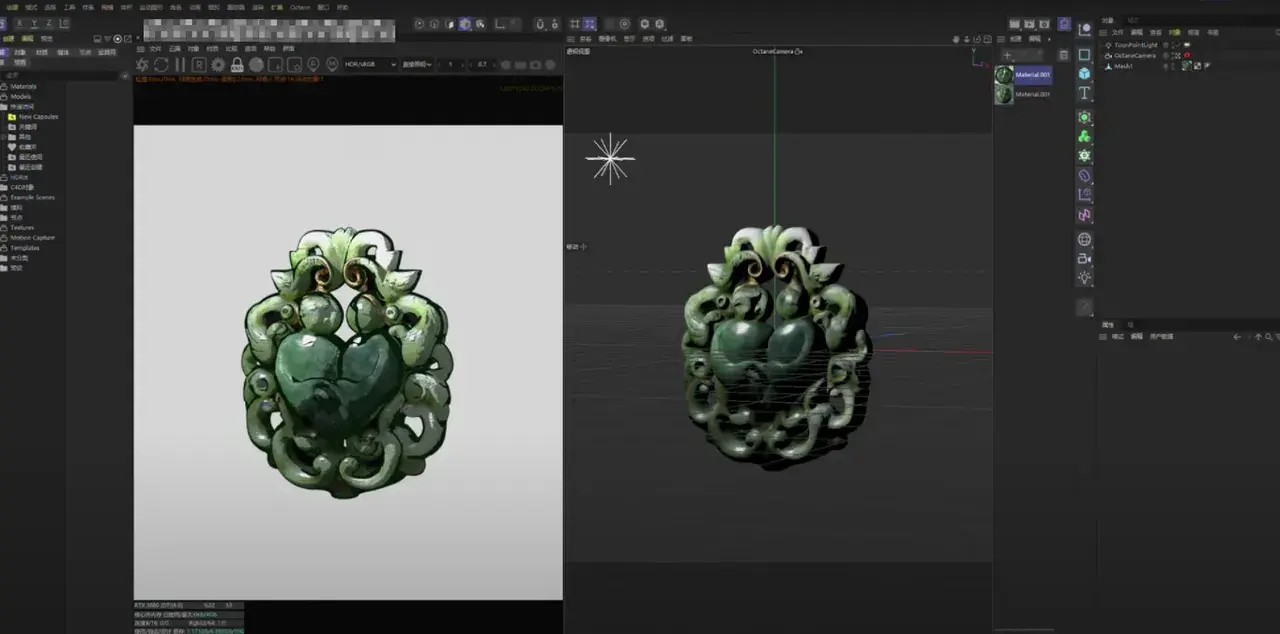
Once the model is ready, we download it as an .fbx or .obj file with its corresponding texture maps. Then, we import it directly into Cinema 4D.
Part 2: Cel-Shading in C4D (Octane)
After generating the base model in Meshy, we move into Cinema 4D to stylize the look with toon shading, using Octane Render for full artistic control.
Step 1: Setting Up Octane Toon Lighting
We use Octane Render in Cinema 4D, which comes with toon shading support. Our process starts by adding a Toon Point Light to the scene, giving us more artistic control over the look of shadows and highlights.
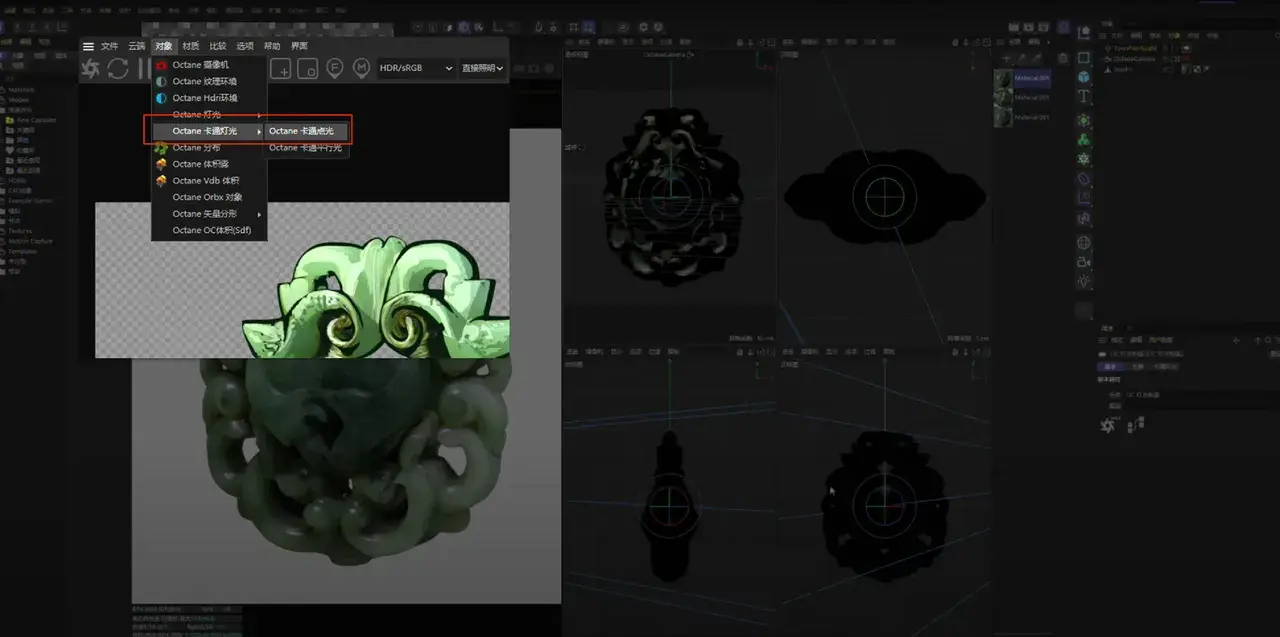
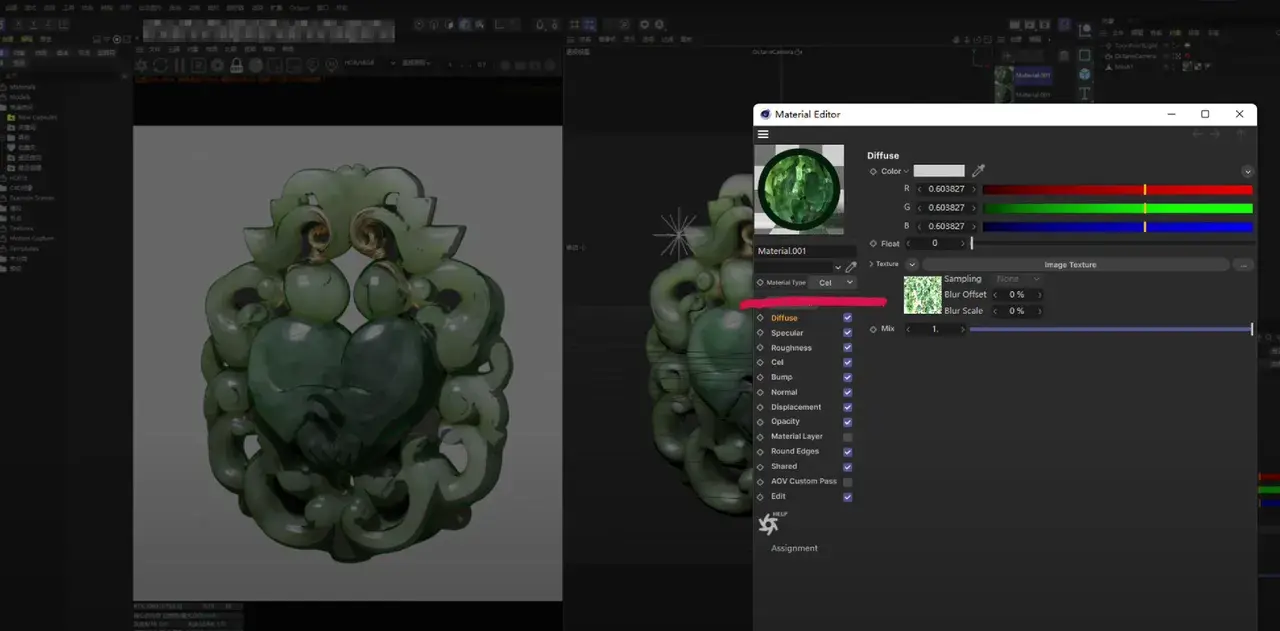
Step 2: Converting Materials to Octane Toon Materials
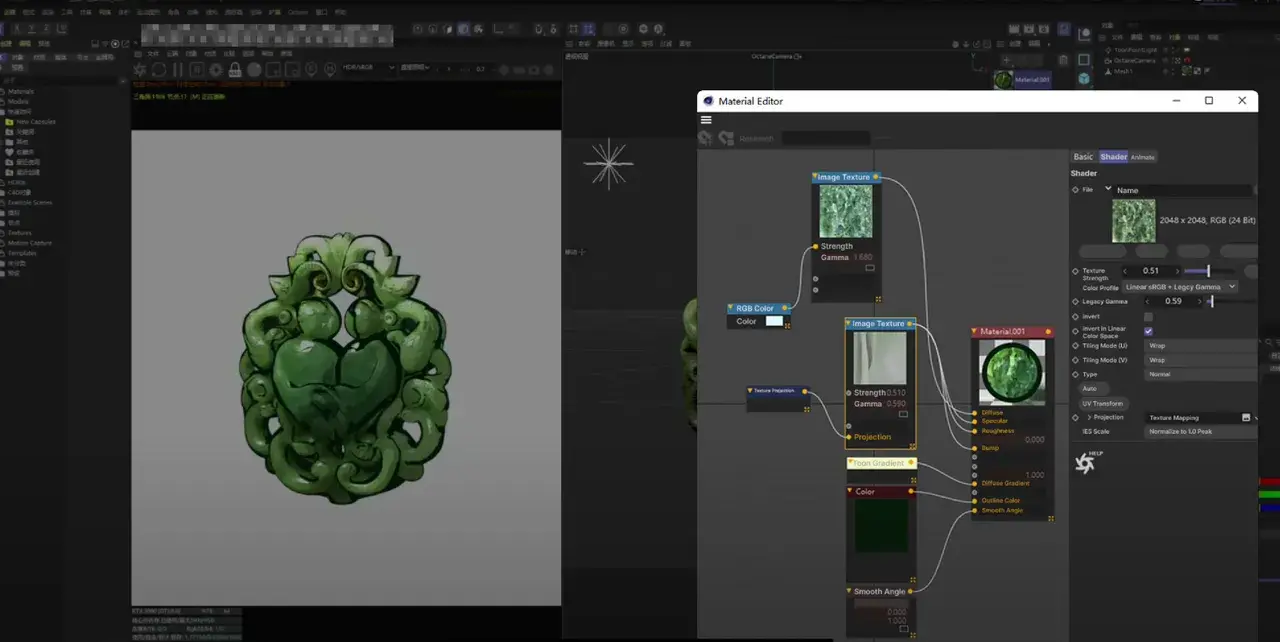
Next, we convert the model's default materials to Octane materials. Under material type, we choose "Cel." This unlocks options specific to NPR-style rendering, including outlines and simplified shading.
Step 3: Adjusting Toon Properties
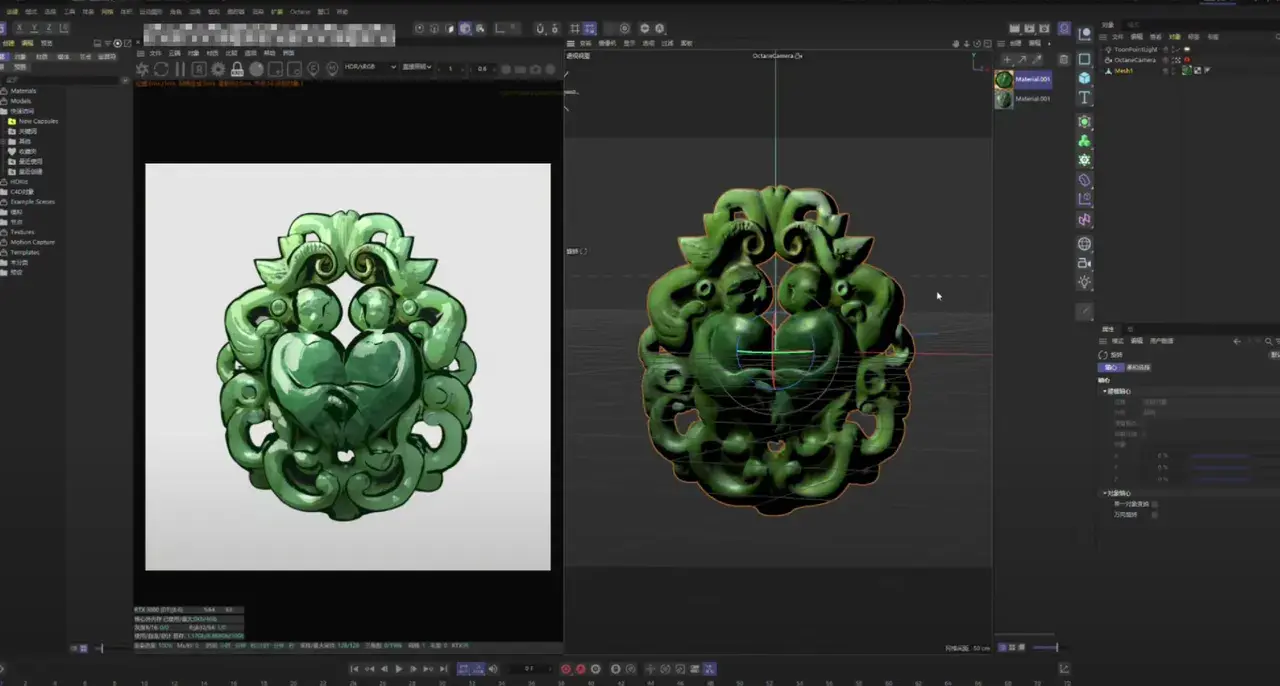
In the Toon material settings, we adjust the outline color and thickness to match our desired art direction. This step defines the visual identity of the asset—whether we want a sharp comic-book style or a soft anime look.
Step 4: Refining Materials - Specularity, Roughness, Bump
We fine-tune the material properties like specularity, roughness, and bump. Here, we reuse the color texture from Meshy as a base, and sometimes layer on additional procedural textures for more visual detail. We can even use projection mapping to customize surface behavior.
Step 5: Baking for Game Engines
If we want to export to game engines like Unity, baking materials are essential. This step ensures our stylized look remains intact in real-time rendering. Alternatively, we can recreate the toon shading inside Unity using similar settings and unlit shaders.
Part 3: Game Implementation
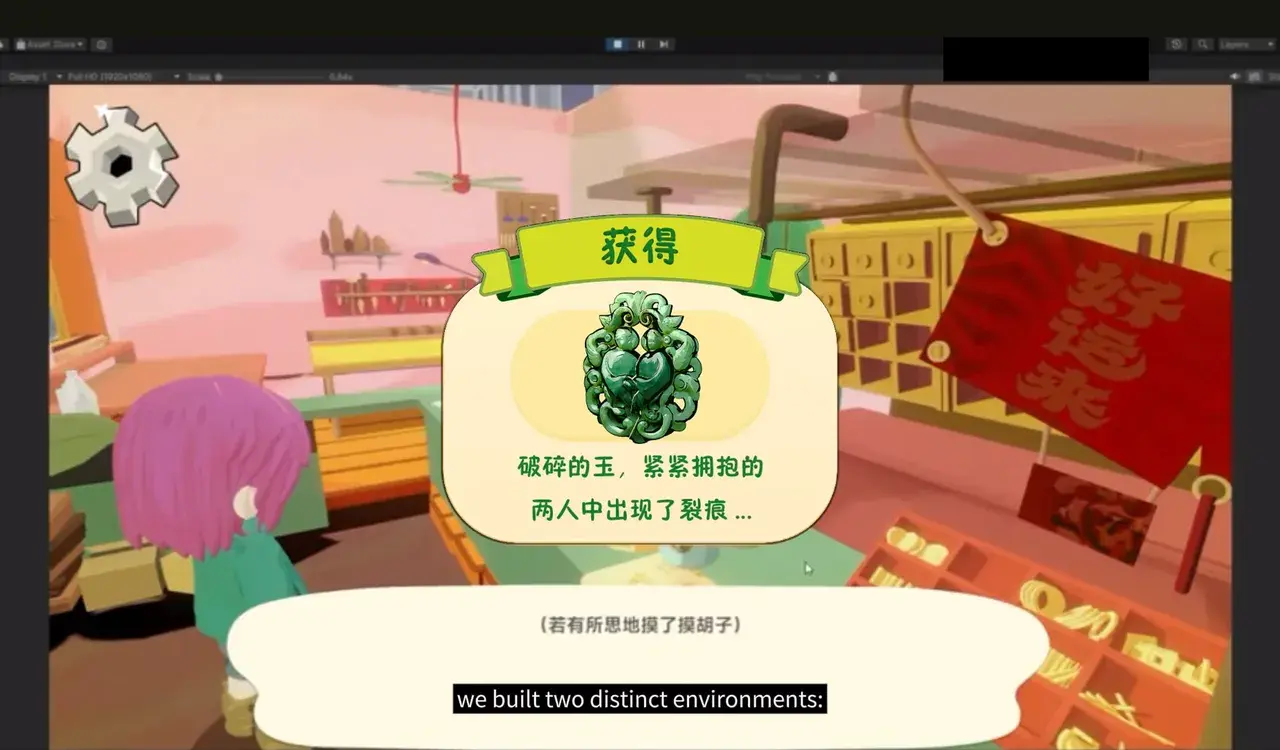
Step 1: Applying the Assets in Our Game - The Envoy Choo
In our current game, The Envoy Choo, we built two distinct environments: a trading sanctuary where players meet NPCs, and floating islands for material collection.
Step 2: Meshy for Niche Props - Masks, Cranes, Statues
Many props in the trading sanctuary—like Buddha statues, cranes, and traditional masks—are hard to find as free, license-free assets. Meshy helps us generate these quickly, complete with texture maps. Then, we bring them into C4D and apply our toon shader preset.

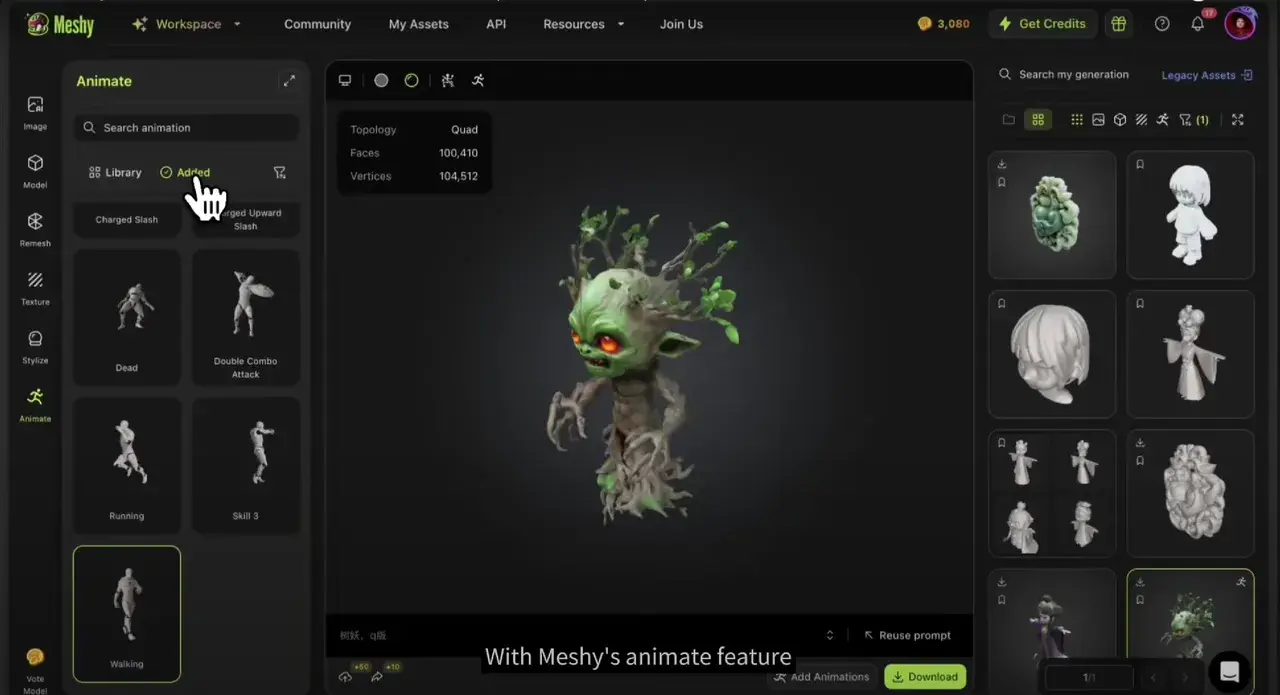
Step 3: Meshy Animate - Rigging and Actions
For the floating island zone, we wanted our enemies to feel alive—not just static obstacles, but characters with real presence. That meant giving them animated behaviors: a tree spirit that lashes out when approached, pauses in eerie stillness when idle, or crumbles dramatically when defeated. We needed quick, game-ready animations to bring those ideas to life.
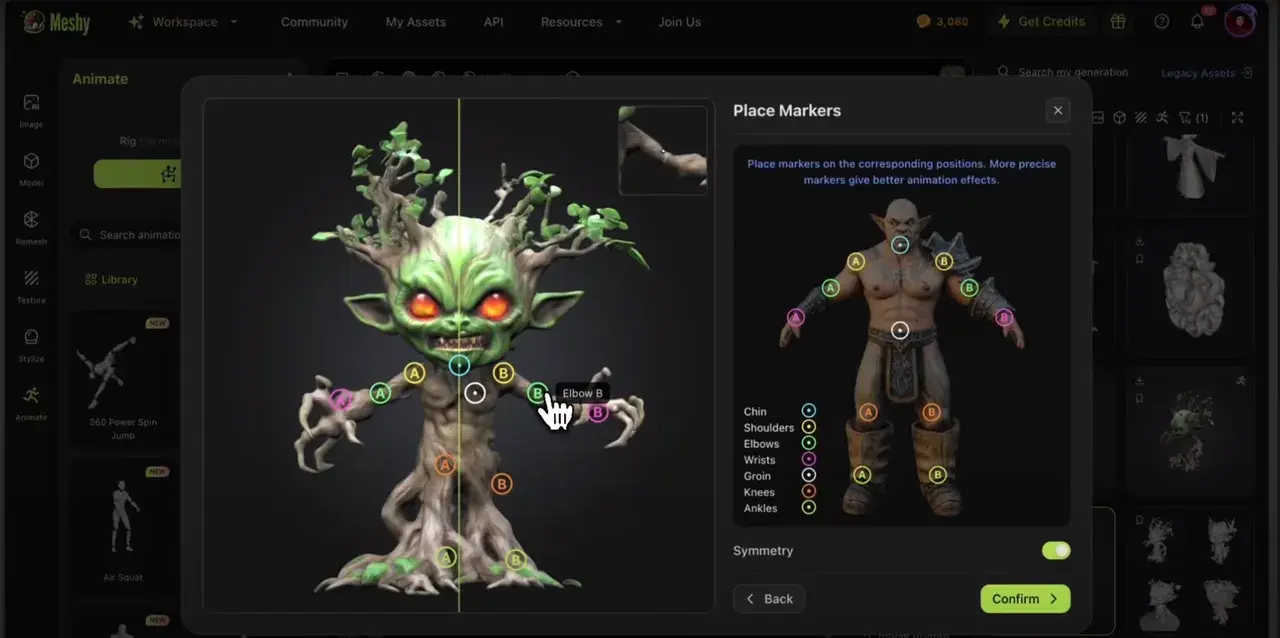
That's where Meshy's Animate feature came in. With automatic rigging and built-in presets like attack, idle, and defeat, we could animate our models in just a few clicks—no manual weight painting or external tools required.

Why Meshy is a Game-Changer:
- AI Texturing - Replaces hand-painted toon shading
Meshy's AI-generated textures take the pain out of stylized rendering. Instead of manually painting every detail or spending hours tweaking UVs, creators get clean, stylized textures instantly. This is especially useful for toon-style games, where color blocking and outlines matter more than photorealism.
- 1-Click Animation - Auto-rigging for characters
Meshy's Animate feature handles rigging and animation with just a few clicks. Upload a character model—no matter how stylized or unconventional—and Meshy will rig it automatically and apply built-in animations like idle, attack, or jump. It's perfect for quick prototyping or populating your game with lively NPCs and enemies.
- Community Assets - Save hours on niche props (statues, masks, etc.)
Searching for unique, culturally specific assets can eat up days—especially if you need them to be license-free and stylized. With Meshy, you can generate everything from Buddha statues to ceremonial masks using simple prompts. No more cobbling together pieces from generic asset packs.
Final Thought—The Power of Meshy in Stylized Workflows
Meshy drastically cuts down the time and effort it takes to go from concept to game-ready asset—whether it's crafting unique props or bringing characters to life with animation. It fits seamlessly into our stylized workflow, giving us full creative control in tools like Cinema 4D and Unity, without getting bogged down by technical bottlenecks.
For indie devs, small teams, or anyone building a 3D-to-2D game pipeline, Meshy isn't just a time-saver—it's a creative unlock. You spend less time wrestling with software and more time bringing your world to life.